Scripture: Numbers 13-14
Learning Objectives:
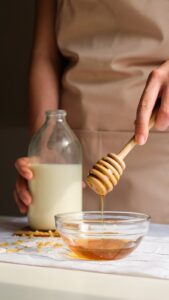
- Students will compare the viscosity of different liquids including milk and honey.
- Students will review God’s plan to provide the Israelites with a land flowing with milk and honey.

Guiding Questions:
What is viscosity?
How can we compare the viscosity of different liquids?
Materials: a laminated piece of paper, pan, marker, stopwatch, measure out 1 tablespoon of: milk, honey, and a liquid with a viscosity between honey and milk such as maple syrup or liquid soap, and extra for touching.
Procedure: Review God’s promise to bring the Israelites to a land flowing with milk and honey and the spies’ report that the land of Canaan was good. Even though some spies were terrified of the powerful people living there, Caleb and Joshua trusted God to lead them. Explain to students that they will be doing an experiment to test liquids such as milk and honey. Review that liquids are things that do not have a shape of their own, and do not always fill all the space in their container. This is unlike liquids and gases. Ask, “Have you ever noticed that some liquids are runnier than others?” Some are thin/fast and some are thick/slow. You might notice this when trying to pour syrup, water, ketchup or soap out of a bottle. Explain that runnier liquids have what is called a high viscosity. Low viscosity is when liquids are thicker. Have students make two lists of liquids that they think have high and low viscosity.
Show students the honey, milk and soap/syrup. Have extra to let them touch it, but if you are using soap, do not let them taste it (so that they don’t accidently ingest soap). Note: At the end, students can enjoy sampling some honey-sweetened milk). Instruct students to make a hypothesis to test which liquids will finish the race the quickest if poured down an even surface. Place the laminated piece of paper directly on the pan and mark a “starting” and “finish” line near the top and bottom with a permanent marker. Draw lines to make “lanes” for each of your test liquids. Give each liquid to a student and on the count of three let them pour the liquid while the teacher holds the pan on an incline (approximately 60 degrees). Assign a student timer for each liquid. Let them practice using the timer first. Time how many seconds it takes for each to reach the finish line. You may want to do more than one trial and explain that repeating experiments increases accuracy of results. Compare the results. Observe, analyze, and record the results in keeping with the scientific method.
Additional Questions:
- Why do you think that milk and honey represented goodness in ancient lands?
- What liquids do you think have the same degree of viscosity as milk? Honey? Soap/syrup?
- How does a liquid’s viscosity effect your ability to empty a bottle when it gets low?
Supplemental Activity: Students can try other liquids in their environment to test for viscosity. You can also encourage them to try adding substances to liquids they already used to see how it changes the viscosity. For instance, they can add flour to milk to see how the added thickness affects the rate at which it flows. They can also test other factors such a temperature. Does hot or cold honey flow quicker? Does changing the incline affect the rate at which the liquids flow?
Written by: Savannah Negas